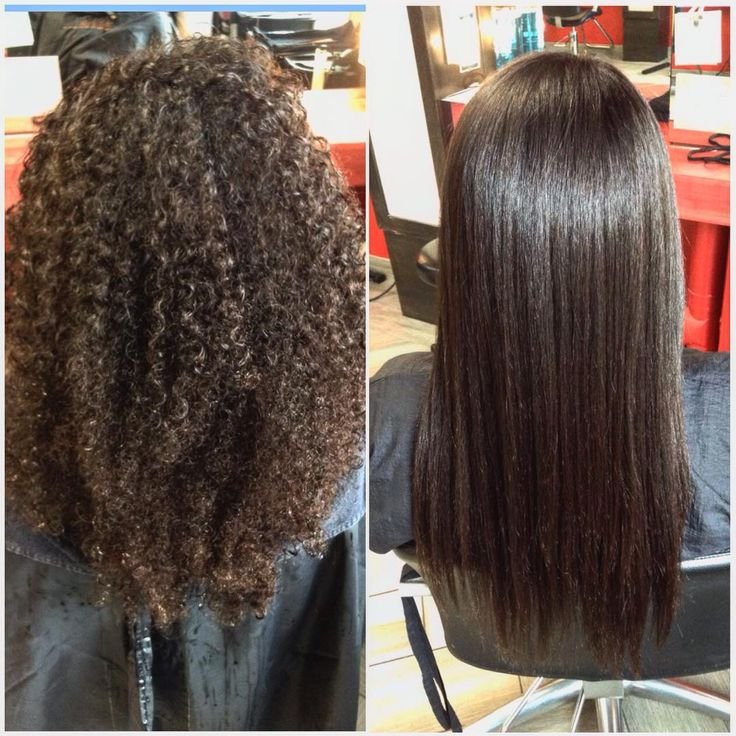
Long and strong hair is all the rage, leaving many people wondering what’s the best way to get silky straight hair. Unlike other straightening methods, Japanese hair straightening is gentler on your hair, and lasts way longer. These treatments can be very pricey in the salon, but you can get great results doing your own Japanese hair straightening at home.
In our Japanese Hair Straightening at home guide, we will show you step by step how to perform a treatment in your own bathroom! But first- what is a Japanese hair straightening treatment exactly?
What is a Japanese Hair Straightening Treatment?
A Japanese hair straightening treatment, (also called thermal reconditioning) works by coating hair in a special solution, that breaks down the hair’s bond. This bond is what gives hair it’s shape and texture, and removing the bond helps keep hair straight. The treatments last about 6 months, and you can shower, swim, and wet your hair, and it will stay straight afterwards!
The treatment involves several important steps, and is fairly labor and time intensive depending on the length and thickness of your hair. Wondering if this type of treatment is right for your hair type? Take a look at who should do these treatments at home.

Who Should Do A Japanese Hair Straightening Treatment At Home?
Not all hair types are created equal, so there are a few things you should consider to find out if this treatment is right for you. Japanese hair straightening treatments work best on frizzy, unruly hair, that isn’t frequently dyed or treated with other chemicals.
Because the treatment is meant to break down the bonds in your hair, it’s important to start from healthy hair. If your hair is already weak and damaged from frequent coloring or other chemical treatments, you won’t get great results, and risk serious damage to your locks.
If you’ve got really thick, curly, wavy, frizzy, and otherwise unruly hair, doing Japanese hair straightening at home will save you so much time in your beauty routine! You’ll wake up to smooth silky locks, saving you so much energy every day. So want to find out how to do a Japanese hair straightening treatment at home? Here is our step by step guide!
DIY Japanese Hair Straightening Treatment At Home- Step By Step Guide
Step 1: Pre-Treatment
Prior to performing a Japanese hair straightening treatment at home, you need your hair to be in it’s best condition. Make sure you haven’t done any other chemical treatments like a perm or coloring recently.
It’s also a great idea to apply a conditioning hair mask in the weeks leading up to your treatment. This will help keep hair looking smoother and straighter following the treatment.
Step 2: Gather All Your Supplies
Gather up everything you are going to need to perform a DIY Japanese hair straightening treatment before you begin.
You’ll need:
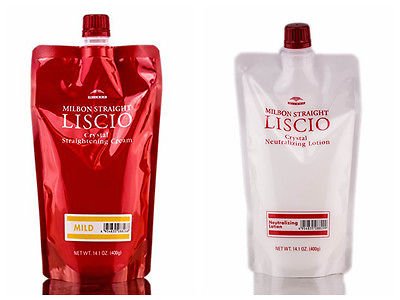
1. Japanese Hair Straightening Treatment Kit
The LISCIO Crystal Cream Straightener kit by Milbon is the best Japanese straightening cream you can get your hands on. The formula comes in three different strength levels – Mild, Normal, and Strong.
2. Clarifying Shampoo
Any type will work, but this one from Kenra is awesome.
3. Ionic Blow Dryer (optional but highly recommended!)
It’s best to use an ionic hair dryer to help reduce frizziness.
4. Hair Straightener (preferably a ceramic coated one)
A ceramic coated straightener helps keep hair as straight as possible after the treatment.
5. Thin Plastic Comb
These thin combs work best for separating hair during treatment
6. Deep Conditioner
Use your favorite deep conditioner after the treatment to keep hair healthy. I use this Macademia hair mask and I love it.
7. The Help Of A Friend
If you’ve have a lot of hair, an extra hand will help you finish faster, and you’ll get more even results.
These days this may not be an option, so just take your time and separate your hair in smaller sections for best results.
Step 3: Shampoo Hair
Shampoo your hair with a clarifying shampoo, and rinse thoroughly. Clean hair helps the straightening solution stick to the strands.
If have sensitive skin, the activator may cause some redness or a full-blown rash. The best way to avoid this is to try to keep the straightening cream off of your scalp and lining your hairline with a little Vaseline (being careful not to get it on your hair).
Step 4: Applying The Activator
This is the step is where the magic begins!
You’ll want to start with a sample patch to see how long the solution needs to sit on the hair to process. Processing time can take where between 10 minutes and 1 hour depending on your hair thickness.
Perform a loop test to see when it’s ready. To learn how to do a loop test, you can check out this video:
It’s important that the activator gets applied as quickly and evenly as possible, so that your hair all gets done as uniformly as possible. Start at the nape of your neck, and apply the relaxer from the ends of your hair, all the way up to about ¼” from your scalp.
Step 5: Rinse Hair
Be super thorough and get all the solution out of your hair!
After you’ve rinsed it all, gently dry your hair with a towel. Be sure not to scrub or pull on hair because it’ll be prone to breakage.
Step 6: Blow Dry Hair
Blow your hair so that it’s not sopping wet, but don’t dry it fully. The key is to keep just enough moisture in your hair for the flat iron to do its job.
Step 7: Flat Iron Hair
Set your straightener to 350 degrees, and work in small sections to straighten all of your hair. Get it as smooth as possible, but work quickly because it can be time consuming and you want to pass the iron on the hair while it still has some moisture.
Step 7: Apply the Neutralizer
The neutralizer works to balance the pH of your hair. Apply evenly all over hair, and let it sit for 5-10 minutes before rinsing it out.
Step 8: Rinse Hair Again
Make sure you rinse your hair for at least 10 minutes and get any remaining solution out of your hair.
If you’ve used Vaseline on your hairline, use a tissue to remove it. Don’t scrub hard!
Step 9: Final Blow Dry
Blow dry your hair from your scalp downwards (in the direction of the hair cuticles), and get it about 90 to 95 percent dry. Your hair should be pretty straight already, but this extra step allows me to style my hair a little bit more and seems to keep it straight for longer.
Step 10: Keep Your Hair Dry
Do your best to keep hair dry for the next 48 hours! It’s even better if you can wait 72 hours.
This may be overkill, but the first night after treatment, I usually sleep on my side on a freshly washed high-thread-count pillow case.
This seems to help the treatment to last a couple extra weeks.
Step 11: Enjoy!
Your style should last about 6 months.
After that, if you want to Japanese straighten your new growth, I recommend using the 2-in-1 Treatment and Protection Cream from Milbon to protect the lower part of your hair that’s already straight, while you work on the top.
That’s it, enjoy your beautiful straight hair!
The process can be a little daunting, so if you have any questions just drop a comment below!