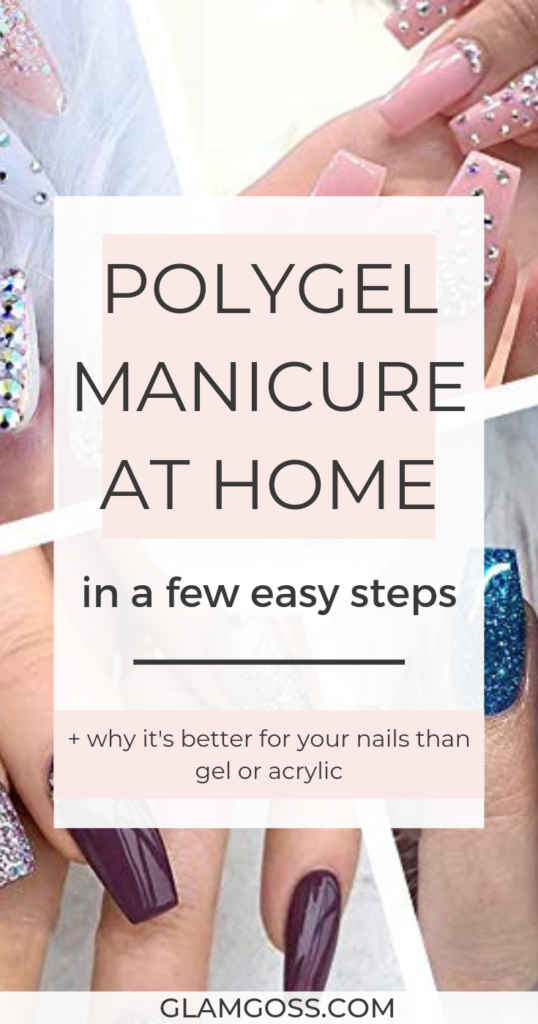
If you love manicures as much as I do, you’ve probably tried every kind under the sun. Gel nails were my latest obsession, but they have a major problem: you can’t get any length with gel! Well my friends, this has been solved in a major way thanks to polygel.
I tried the best-reviewed polygel nail kits, and I’ll show you which one will give you a perfect DIY manicure at home. But first, what is it?
What Is Polygel For Nails?
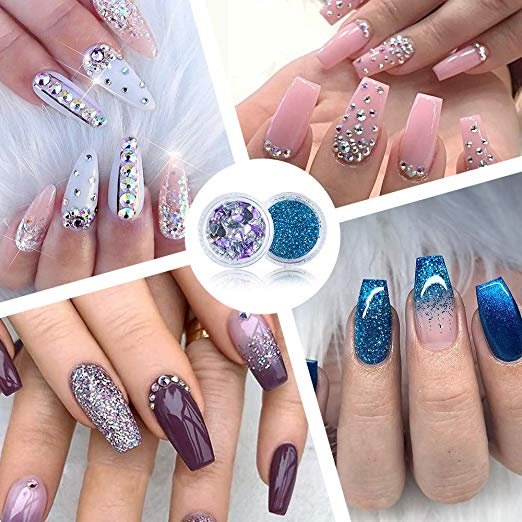
While it’s been on the market for a while now, most women haven’t even heard of polygel. Simply put, polygel is a nail treatment that gives you strong, flexible long nails. The formula is lighter than acrylic nails, and stronger than traditional gel treatments. And best of all? It’s not that hard to do it yourself!
You can use polygel to overlay on your existing nails, or sculpt a stylish full set. To cure it, you use an LED lamp, just like with gel. This is nice, because it affords you a chance to shape your nail.
So, by now you are probably wondering—does this stuff last as long as regular gel?

How Long Do Polygel Nails Last?
I can speak from experience, polygel will hold for weeks! And it won’t lift or crack the way gel nail polish can.
Another cool thing about polygel is that you can “fill in” the nail again just like you would with acrylics. After the nail has grown out, you can rebalance the nails to get more life from your polygel manicure.
Or, if you are ready to get rid of it, simply file away your polish and remove the rest with acetone-soaked cotton pads wrapped in foil. It does take some time, but it’s not as bad as regular gel and your nails underneath will still be in great shape.
The Best Polygel Nail Kit For DIY Nails
So, how can you get your hands on a polygel nail kit? Here are the best DIY polygel manicure sets on the market right now! I’ve tried and tested them all, and I’ll let you know which one gave me the best results.
(Be sure to check out my pro tips at the bottom of the post. There, I’ll share all my advice for getting the best results from your DIY polygel kit.)
#1. Hand & Nail Harmony Gelish Polygel
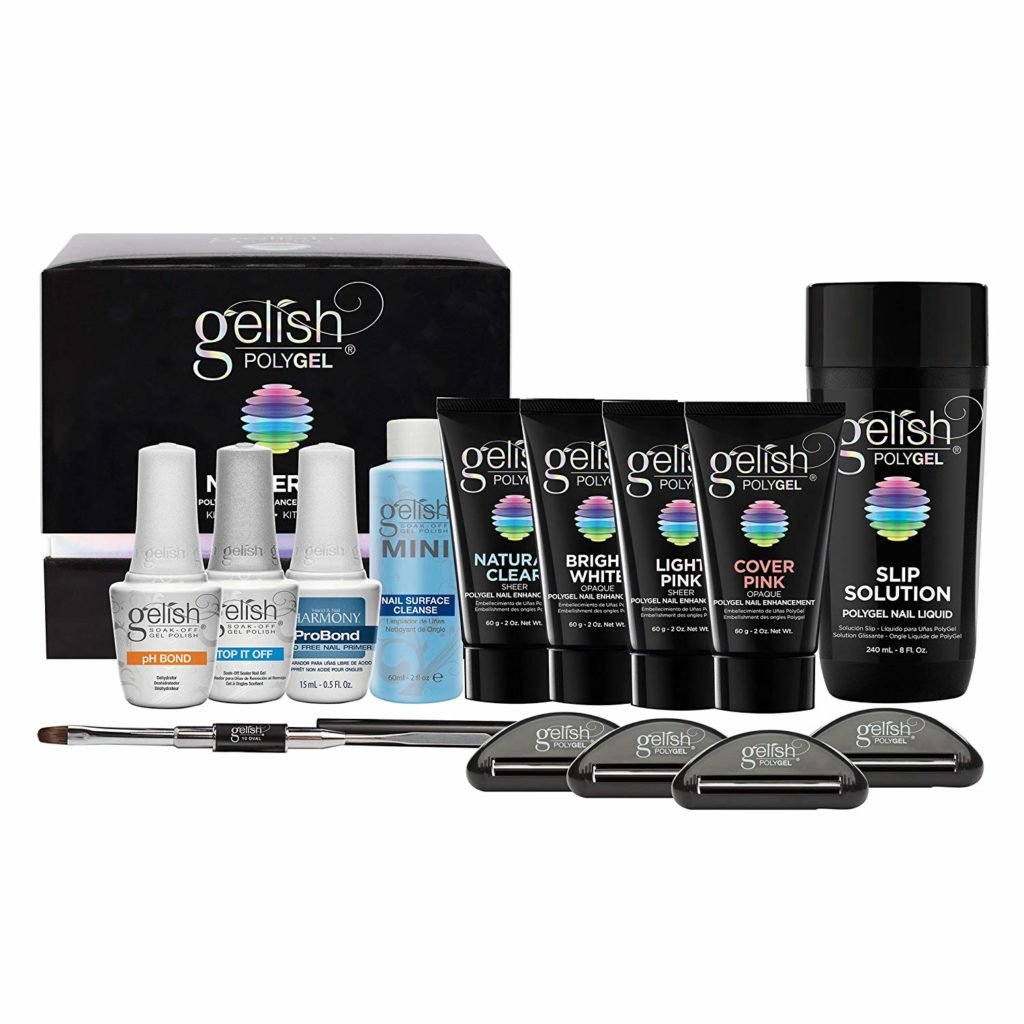
Polygel was first introduced by Gelish. I had great results with their nail dipping powder kits, so I couldn’t wait to get my hands on this set.
Here’s how I performed my mani, step by step.
Step by Step Gelish Polygel Manicure
After watching a youtube video (which I will share below) I was ready to get started. The kit comes with everything you need to perform your Polygel manicure, except an LED nail lamp.
If you don’t already have your own, make sure to grab one before starting. And if you are a nail pro yourself, Gelish also offers a Polygel nail kit with a professional nail lamp.
- To begin, I prepped my nails. I cleaned them well, removed cuticles, and buffed my natural nails. It’s important to buff the nails really well to get a better adhesion with your polygel.
- Next, I wiped them down with the nail cleansing solution that’s included in your kit. That helps remove any excess dust from your fingers. After your nails are all clean, do a light coat with the Gelish PH Bond polish. Be really careful not to get these polishes on your cuticles! I followed that up with a coat of the PH primer, and our nails are ready to go!
- Next, I chose the light pink polygel to start. I got out the slip solution, and placed in in a shallow dish. Next I set the included brush and spatula nearby. Finally, I unwrapped one of the included nail guides, that helps shape your nail, and placed it on my finger.
- With the nail guide in place, I was ready to add the polygel. I opened the tube, and squeezed a small amount (pea size to start). Then I used the spatula to move the polygel onto the center of my nail. Afterward I quickly wiped the spatula off with a lint free cloth.
- Now it’s time to shape the polygel. I started by dipping my nail brush into the slip solution. It’s important to always keep your brush wet, so that the polygel doesn’t stick to the bristles. Next I pressed the brush gently against the polygel, and started to mold it to my nail.
- Since I began in the middle of my nail, I used the brush to move the poly gel upward, creating a longer tip. I continued pressing the bead of polygel into place with the brush, and dipped the brush into the slip every so often to keep it wet.
- After I had the final shape on my tip that I wanted, I added a little more polygel to coat the bottom of the nail. From there I used the brush to smooth the areas, so that the whole nail looked even. I paid close attention to the cuticle area, so that it looks great even when it’s grown out. Finally, it was time to cure the nail!
- To cure your polygel, just pop it under and led lamp for 30 seconds. And that’s it, you’ve successfully applied your polygel! Go ahead and repeat this process until you’ve done all your fingers.
- Next, you need to file your nails into the final shape you want. Polygel can leave buildup under the nails, so it’s best to use a nail drill to get them into the perfect shape. After I filed them down, I cleaned them off with the nail cleanser.
- And your final step for polygel manicure is to seal with a top coat. Use the included top coat, and cure it for 30 seconds under your nail lamp. I was so happy when I finally finished, and was amazed at how professional my nails looked!

Thoughts on the Gelish Polygel Kit – Is this the Best Polygel Nail Kit?
Overall, I was shocked at how much my manicure looked like salon acrylics. The biggest learning curve for me, was shaping the tips, since I don’t have much experience doing this.
The shaping and filing part did take a little longer on the first nail, but I got the hang of it very quickly. Overall this polygel nail kit is super easy to use, and I really liked the professional quality of all the products. My polygel mani lasted about 3 1/2 weeks, when it started to look grown out. No cracking or chipping, and it lasted at least a week and a half longer than regular gel nails.
I got the pro kit to use for my polygel manicure, because it included a few different colors. I wanted to note that if you have gel colors at home, you can use them with the clear color included in the gelish kit. Just an extra step, and you can customize these colors for a unique look! And now onto the next Polygel kit!
#2. Makartt French Collection Poly Nail Extension Gel Starter Kit
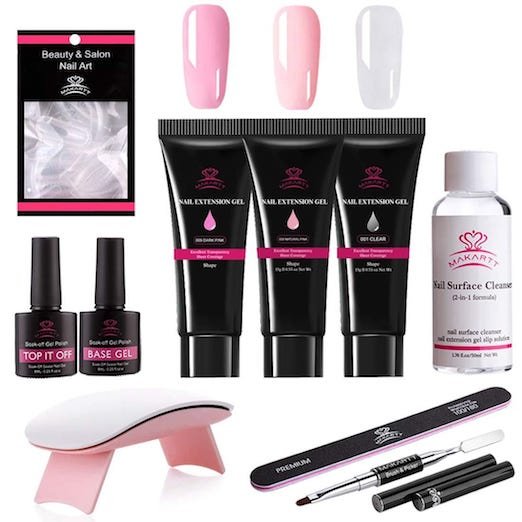
The next kit that I tried was the French Collection Poly Nail Extension Gel Starter Kit from Makartt. It’s the same type of formula as polygel, but the name “Polygel” belongs to Gelish, so it’s called “Poly Nail Extension Gel” instead.
Here’s how I did my Makartt Polygel mani, step by step.
Step by Step Makartt Polygel Manicure
Of course, I started by watching a few Youtube videos to see how this product differs from the Gelish Polygel. Turns out, the Makartt gel is very similar, it’s just slightly softer and stickier than the Gelish. I ended up using a little bit more slip solution to keep it from sticking to my brush. This is not a bad thing though: I’d say the texture of the Makartt is the best of all the polygels I’ve tried – it’s easy to apply and gives you a lot of control.
The kit includes a great step by step guide, but I did a few things differently.
To get prepared, layout all the items in your kit. I recommend setting up near an outlet (the LED Nail Lamp cord is ridiculously short). While you can use the included “Nail Surface Cleanse” as both your slip solution and your dehydrator, I suggest getting a bottle alcohol over 70% (I used 91%). You could use the alcohol as the “slip” to shape your polygel too but I don’t recommend it.
- I started by prepping the nails. I removed cuticles, filed and buffed my nails really well. Then I cleansed the nails with a cotton ball soaked in the alcohol.
- Next, I applied a thin layer of the base coat, and cured for 30 seconds under the LED lamp.
- To create the polygel, you have two options. You can mold the shape inside one of the included nail forms. The other option is to form it directly on the nail. If you are a beginner, the nail forms will help you get an even look, but I did mine directly on the nail, with the help of the nail guides.
- I placed the nail guide on my finger.
- I squeezed a bead of polygel onto my nail. Then I began to form the bead with the brush dipped in the slip solution. Note: if you’re just starting, use the darkest color you can so it’s easier to judge the thickness of the polygel – if you start with the clear like I did, it’s very hard to tell!
- Once I had the polygel shaped properly, I cured it under my LED lamp for 30 seconds.
- Next, I filed all my nails in the final shape I wanted. Just like with the Gelish polygel, I needed a nail drill to properly file the area under the nail.
- Once my nails had the shape I wanted, I cleaned them with the alcohol.
- The final step is to seal the gel with the included top coat, and cure under the LED lamp for another 30 seconds.
My Thoughts on the Makartt Polygel Nail Kit – Is this the Best Polygel Nail Kit?
Price: Overall, I thought the Makartt Nail kit was a really good value. Although this kit isn’t as expensive as the Gelish, it’s probably even better than the Gelish. That’s because the consistency of the Makartt polygel strikes a perfect balance between sticky and runny, making it the easiest to apply.
Colors: While this kit doesn’t have a huge selection of colors, they are basically the shades I find myself using the most anyway. The “Dark Pink” (number 009) color they have is probably my favorite of all the kits I tried.
Extras: I liked that the kit included plenty of nail forms and nail guides, because they were really helpful at the beginning! I wish this kit included a nail drill (you’re going to need one!). Makartt has the best newbie-friendly nail drill I’ve tried, even though it’s a little more expensive than the ones on Amazon.
Durability: The first time I used the Makartt kit, my mani lasted a little over 3 weeks before I noticed some chips at the end and it was time for the polygel to come off. These days, I spend a little bit of extra time doing prep work, buffing the nails really well, and the polygel will last close to a month. I just reapply a bit of polygel on the new growth to even it out.
What I didn’t like: I will say maybe the thing I liked the least about this kit is that the quality of the included brush is not as high as the one in the Gelish kit. This didn’t make it harder to get a good application from the polygel—it’s just a matter of preference.
Another thing I found annoying was the LED lamp cord being so short. The lamp itself works very well and fast though.
#3. Modelones Poly Nail Gel Kit Enhancement Builder
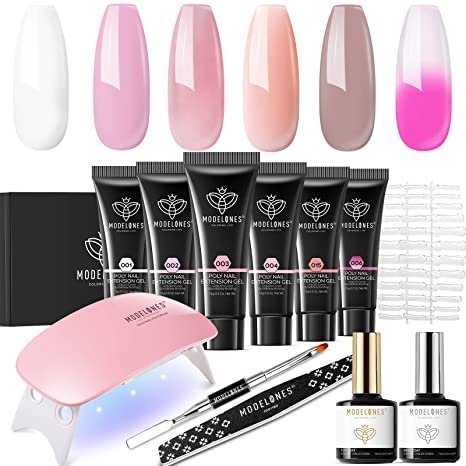
The final polygel kit I tried, was from a brand I had never heard of before. Despite this, I really loved that this kit came with some extras that set it apart from the other two kits.
The Modelones kit comes in a nicely packaged box. I really liked that you have an organized way to look at all the products, which isn’t the case with the other two kits. The polygel set comes with its own slip solution and six color options. Some kits include nail glitter as well. For me, I don’t usually use any of these extra temperature changing colors or glitters, but they’re still nice to have! This kit does include a nail lamp but I still recommend getting a more powerful LED nail lamp.
One difference with this kit, is that it has “dual nail forms” that help you build the nail shape before you apply to your nail. It doesn’t include the paper nail guides that you can get with the other two kits. I just decided to buy my own though, since I don’t like nail forms.
Here’s a step by step guide of how I performed my Modelones Polygel Manicure.
Step by Step Modelones Polygel Manicure – Is this the Best Polygel Nail Kit?
You’re probably sensing a common theme here, but I watched some youtube videos to see if there was anything different with this polygel set. It’s pretty straightforward, and the process is just the same with this kit.
- Start by cleaning and buffing your nails. The kit comes with a small nail file, but I still use a large one because it’s a little easier. After you buff, clean them with a little rubbing alcohol or the “slip”. Use very little slip as this polygel is so runny!
- Next, I applied the base coat evenly to the nails, and let them cure for 30 seconds in under the LED lamp.
- Then, I covered my nail with the paper nail guides that I bought (but you can use the dual nail forms instead).
- I chose the soft pink polygel to start. Then, I squeezed a pea sized bead onto the spatula and applied to the center of the nail.
- Next, I dipped my brush into the slip, and lightly formed the shape of my nail with the polygel. Be very gentle as this polygel tends to slide around!
- Once I had a nice shape on all the nails, I cured under my LED lamp for 30 seconds. I felt it was a little soft still, so I did an extra 30 seconds just to be sure.
- After my nails were shaped and dry, I filed them into shape. Again I needed to use my nail drill to get the back of the nail, though it took a little longer with the Modelones as I had to lay it a little thicker to avoid it sliding.
- Once my nails were shaped, I cleaned them with a cotton pad, and dipped in the slip solution.
- I topped off the nails with the top coat, and cured under the LED lamp for 60 seconds.
My Thoughts On The Modelones Polygel Manicure – Is this the Best Polygel Nail Kit?
I think the Modelones kit is pretty good, and my nails did look professional after a couple of tries.
Maybe it’s because it was my first time using polygel, but I felt like it was harder to mold the gel in this kit. That is because the Modelones polygel itself is very soft, so no matter how careful you are with the slip solution, it’s very hard to keep it from sliding everywhere. And if you don’t use enough slip solution, it gets sticky.
I also think this polygel is slightly less durable. It seemed to take a little longer to get a solid dry result than the Gelish or Makartt brands, probably because the gel itself is so runny. My mani lasted about 2.5 weeks, a little less than with the others (I also noticed the tips were getting a little discolored towards the last week, but it’s hard to say what caused that).
The color selection is really nice and, if you’re a little more adventurous than I am, you can have a lot of fun with the temperature-changing color.
Finally, I have to say that everything with this kit is on the smaller side. All the tubes of polish and slip are quite small, so I think it won’t last as long as the others.
Overall, while this kit is cheaper than the others and it includes some nice extras, the polygel is so temperamental that I ended up having to redo my nails a few times, and sometimes I just felt like giving up, but practice is essential with any polygel brand.
Which One Is The Best Polygel Nail Kit?
After I put all these Polygel kits to the test, there was one that just stood out from the rest: The French Collection Poly Nail Extension Gel Starter Kit!
What makes the Makartt Kit better than the rest? The quality of the gel, the price and the professional results!
While, after some practice, my manicure looked great with the other two kits, the end result with the Makartt polygel was more professional looking. For someone like me, if I am going to spend that long at home doing my own nails, they better look as good as they do in the salon!
The Makartt really delivered that result, and it also lasted the longest. Nearly a month before I needed to remove it! I don’t know about you, but that’s way better than some salon manicures I’ve had.
The final reason that I think the Makartt kit is so great? It’s got everything you need to start and the colors are the ones I use most often!
If you are on the fence about it, at the time of writing, you can get 15% off any of their products with coupon code SAS15, making it even better value for money than the other kits.
If you are ready to try this trend at home, check out these tips to get the best results!
Tips For Doing A Polygel Nail Manicure At Home
- Watch a few Youtube videos before you get started. I’ll link a super helpful one below.
- Make sure to keep the brush wet with slip solution or alcohol. This helps to avoid sticky polygel, and helps you shape the nail faster.
- Take your time, there’s no rush. Learning to get great results means practice, and because you have to cure the nail you have plenty of time!
- Invest in good tools. If you want a great result, invest in the few tools you need that don’t come with the kit. I love using a small shot glass or nail art jar to keep the slip. If your kit doesn’t come with one, a LED nail lamp is necessary. Finally, a good nail drill will allow you to thin out the tips of your nails and give you professional looking results.
Helpful Polygel Nail Kit Tutorial Using Gelish Polygel
I hope you enjoyed this review of the best polygel nail kit! Have you all tried this nail treatment before? If so, check out my Pinterest page and let me know how it went in the comments!

I would love to try your product. I want to start doing videos. Free advertising for you. Tell me what you think. Thank you